Policies_LDAP_UserGroups_Snwls
The LDAP > User Groups page allows you to conduct a search for User Groups, synchronize LDAP servers, or Import Users and Groups from the LDAP server or a Local Directory.
The LDAP > User Groups Search is useful if you have a high number of user groups and need to find one or more with specific text in the Name, Mirrored From, User Name, or Type fields.

To search for a user group, follow the steps listed below:
1. Select the user group field to be searched. You can select either the Name, Mirrored From, User Name, or Type fields.
2. To specify what part of that field to match against, choose from the following:
• Equals—The entire field must match the text you provide.
• Starts with—The field must start with the text you provide.
• Ends with—The field must end with the text you provide.
• Contains—The field must contain the text you provide.
3. In the blank field, type in the text that you want to search for.
4. Click Search.
5. Click Clear to return the search fields to their default values and clear the text field.
The LDAP > User Groups page allows you to synchronize your LDAP to easily authenticate users. Click the Synchronize LDAP link to efficiently synchronize the list of User Groups you want added to the LDAP directory.
Note that synchronizing user groups from LDAP may do the following:
• Replicates any membership changes for user groups listed in the User Groups Mirrored from LDAP list.
• Removes any deleted user groups from the User Groups Mirrored from LDAP list.
• Removes client groups for the deleted user groups.
Deleting User(s)/User Group(s)
To delete user groups from the LDAP > User Groups page, select the check box corresponding to the User Group you wish to delete. Then, click the Delete User(s)/User Group(s) link or click the Delete icon for that group.
Importing User Groups from LDAP
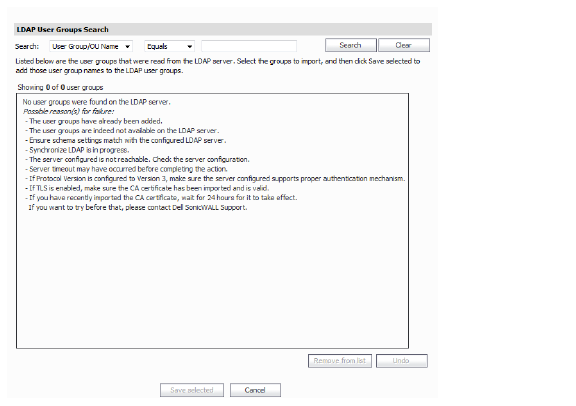
To import user groups from your LDAP server, click the Import User Groups from LDAP link. A list of available user groups from the LDAP server displays. You can then select the groups to import and click the Save Selected button to add those user groups to the LDAP user groups.

To remove user group(s), select the group, then click the Remove from List button.
Note If there are no user groups found on the LDAP server, a list of possible reasons will display. See the image below.
To import users from your LDAP server, click the Import Users from LDAP link. A list of available users from the LDAP server displays. You can then select the users to import and click the Save selected button to add those users to your LDAP users.
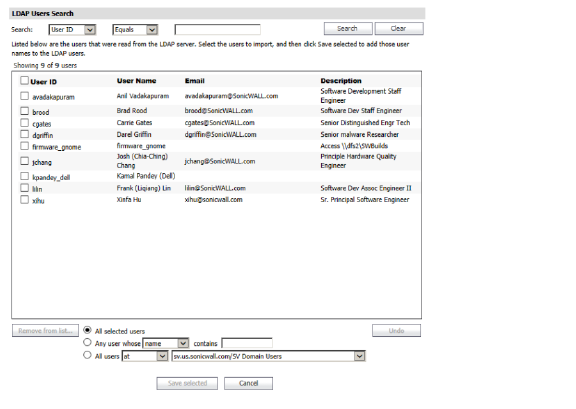
There are several ways to remove users:
• All selected users—Select the users from the list, then click the All selected users radio button. Click the Remove from list button.
• Any user whose [Name/Description/Location] contains [field]—Select either Name, Description or Location from the drop-down list, then specify the field. For example, you may select Location, then specify the field as “San Jose” to find all users that located in San Jose. Click the Remove from list button to remove these users from the list.
• All users [at/ at or under]—This option can be used to remove users under an email alias or similar groups, such as “engineering@sonicwall.com.” By clicking the Remove from list button, it will remove all users listed in the engineering@sonicwall.com group.
Note If there are no user groups found on the LDAP server, a list of possible reasons will display. See the image below.

Importing User Groups from LDIF
The Content Filtering Client also supports importing from DAP Data Interchange Format (LDIF) files. LDIF is a standard plain text data interchange format for representing LDAP directory content. While LDAP is the recommended format to use, LDIF is a more secure method for administrators because they do not have to connect to a server to retrieve information, unlike LDAP.
LDIF files must contain schema attributes that are the same as the current LDAP schema settings. The following schema is configured for User Groups:
• LDAP Schema - Microsoft Active Directory
• Group Object class - group
• Member attribute - member
Note If you need to edit the User Groups, you will need to upload a new LDIF file with the changes.
To import an LDIF file, click the Import User Groups from LDIF link. Click the Browse button to select the LDIF file. Then, click Import.

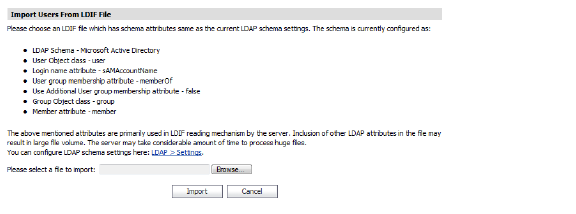
Similarly to Importing User Groups from LDIF, you can Import Users from LDIF files. While LDAP is the recommended format to use, LDIF is a more secure method for administrators because they do not have to connect to a server to retrieve information, unlike LDAP. LDIF files must contain schema attributes that are the same as the current LDAP schema settings. The following schema is configured for User Groups:
• LDAP Schema - Microsoft Active Directory
• User Object class - user
• Login name attribute - sAMAccountName
• User group membership attribute - memberOf
• Use Additional User group membership attribute - false
• Group Object class - group
• Member attribute - member
Note If you need to edit the Users, you will need to upload a new LDIF file with the changes.
To import an LDIF file, click the Import Users from LDIF link. Click the Browse button to select the LDIF file. Then, click Import.
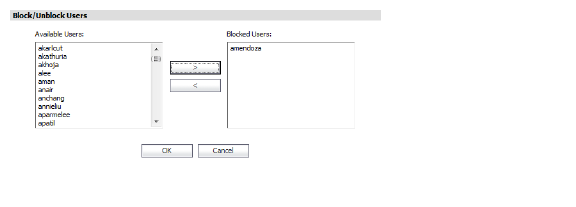
To block users:
1. Click the Block/Unblock Users link. The Block/Unblock Users dialog box displays.
2. Select the username you wish to block from the list of Available Users.
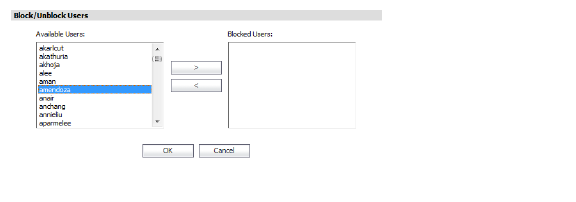
3. Then, click the > button to move the user to the Blocked Users list. Click OK to finish.
To unblock users:
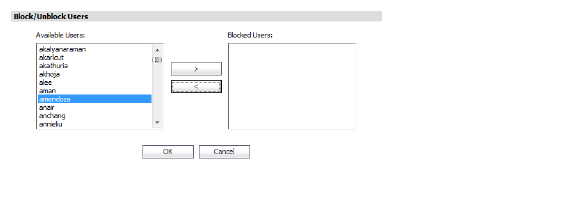
1. Click the Block/Unblock Users link. The Block/Unblock Users dialog box displays.
2. Select the username you wish to unblock from the list of Blocked Users.
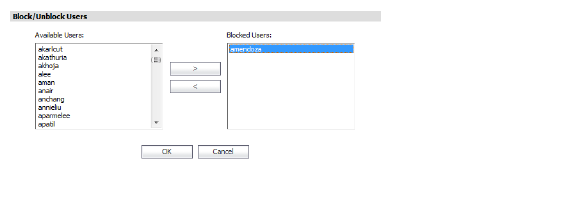
3. Then, click the < button to move the user to the Available Users list. Click OK to finish.
The LDAP > User Groups page allows you to assign users to primary groups. Primary Groups are essential in organizing users and ensuring the proper policies are assigned to each user. In a typical situation, an individual user may belong to multiple groups, each of which has a variety of policies enforced. To ensure the correct policies are applied to this user, the administrator is recommended to assign the primary group to which the user should belong.
Note If a user is not assigned to a Primary Group, Dell SonicWALL will assign the user to the Primary Group that is believed to be best suited.
To assign primary groups to users:
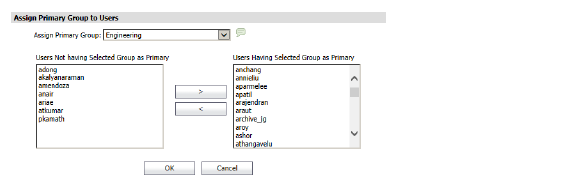
1. Click the Assign Primary Group link. A dialog window will display with your list of groups and users.
Note This may take several minutes to populate.
2. Select the Primary Group from the drop-down list at the top of the window. Based on the Primary Group selected, the Users Not Having Selected Group as Primary and Users Having Selected Group as Primary lists will populate.

3. Select a username from the list, then click the < button to add this user to the Users Not Having Selected Group as Primary. This user will not have the selected Primary Group as his/her primary group.
Select a username from the list, then click the > button to add this user to the Users Having Selected Group as Primary. This user will have the selected Primary Group as his/her primary group.
4. Click the OK button to finish and save changes.