VPN_dhcpRelayView
The VPN > DHCP over VPN page allows you to configure a SonicWALL SuperMassive to obtain an IP address lease from a DHCP server at the other end of a VPN tunnel. In some network deployments, it is desirable to have all VPN networks on one logical IP subnet, and create the appearance of all VPN networks residing in one IP subnet address space. This facilitates IP address administration for the networks using VPN tunnels.
The SonicWALL SuperMassive can be configured as a Central Gateway or as a Remote Central Gateway with VPN tunnels to pass initial DHCP traffic as well as subsequent IP traffic between sites.
When configured as a Central Gateway, the firewall relays DHCP packets from the client on the remote network to the DHCP server on the central site.
When configured as a Remote Gateway, the firewall passes DHCP broadcast packets through a VPN tunnel.
Configuring DHCP over VPH for a Central Gateway
To configure DHCP over VPN for a Central Gateway:
1. Go to the VPN > DHCP over VPN page.
2. Under DHCP over VPN, select Central Gateway from the menu.
3. Click Configure.
The DHCP over VPN Configuration dialog for Central Gateway a is displayed.
Select Use Internal DHCP Server to enable the SonicWALL Global VPN Client or a remote firewall or both to use an internal DHCP server to obtain IP addressing information.
5. Select the For Global VPN Client option to use the DHCP Server for Global VPN Clients.
6. If you want to send DHCP requests to specific servers, select Send DHCP requests to the server addresses listed below.
7. Click Add.
The Add DHCP Server window is displayed.
Type the IP addresses of DHCP servers in the IP Address field, and click OK. The SonicWALL SuperMassive now directs DHCP requests to the specified servers.
9. Type the IP address of a relay server in the Relay IP Address (Optional) field.
10. To edit an entry in the IP Address table, click Edit. To delete a DHCP Server, highlight the entry in the IP Address table, and click Delete. Click Delete All to delete all entries.
Configuring DHCP over VPN for a Remote Gateway
1. Go to the VPN > DHCP over VPN page.
2. Under DHCP over VPN, select Remote Gateway from the menu.
3. Click Configure.
The DHCP over VPN Configuration dialog for a Remote Gateway is displayed.
Under the General tab, the VPN policy name is automatically displayed in the Relay DHCP through this VPN Tunnel box. The VPN policy name is displayed only if the VPN policy has the Local network obtains IP addresses using DHCP through this VPN Tunnel option enabled on the VPN > Settings page under the Network tab.
Note Only VPN policies using IKE can be used as VPN tunnels for DHCP.
4. In the DHCP lease is bound to menu, select the interface you want.
5. (Optional) In the Relay IP address box, enter the IP address for the DHCP Relay Agent.
The Relay IP address is used as the DHCP Relay Agent IP address (in place of the Central Gateway’s IP address) and must be reserved in the DHCP scope on the DHCP server. This address can also be used to manage the firewall remotely from behind the Central Gateway through a VPN tunnel.
6. (Optional) In the Remote Management IP Address box, enter the IP address for the Remote Gateway.
The Remote Management IP Address is used to manage the firewall from behind the Central Gateway and must be reserved in the DHCP scope on the DHCP server.
7. (Optional) Select the Block traffic through tunnel when IP spoof detected option if you want it.
If you select the Block traffic through tunnel when IP spoof detected option, the SonicWALL SuperMassive blocks any traffic across the VPN tunnel that is spoofing an authenticated user’s IP address. If you have any static devices, however, you must ensure that the correct Ethernet address is typed for the device. The Ethernet address is used as part of the identification process, and an incorrect Ethernet address can cause the firewall to respond to IP spoofs.
8. (Optional) Select the Obtain temporary lease from local DHCP server if tunnel is down option if you want it.
If you select the Obtain temporary lease from local DHCP server if tunnel is down option, temporary DHCP leases can be obtained from the local DHCP server if the VPN tunnel fails. After the VPN tunnel becomes again active, the local DHCP server stops issuing leases.
9. (Optional) If you want to allow temporary leases for a certain time period, type the number of minutes for the temporary lease in the Temporary Lease Time box. The default value is 2 minutes.
Configuring Static DHCP Devices on a LAN
An example of a static DHCP device is a printer as it cannot obtain an IP lease dynamically.
To configure a static DHCP device on a LAN:
1. Go to the VPN > DHCP over VPN page.
2. Under DHCP over VPN, select Remote Gateway from the menu.
3. Click Configure.
The DHCP over VPN Configuration dialog for a Remote Gateway is displayed.
4. Click the Devices tab.
Under Static Devices on the LAN, click Add.
The Add LAN Device Entry dialog appears.
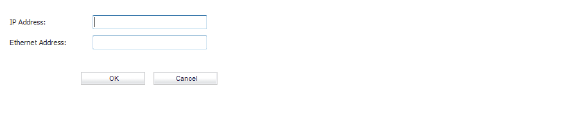
6. In the IP Address box, enter the IP address of the device you want add.
7. (Optional) In the Ethernet Address box, enter the Ethernet address of the device you want.
Note You only need to enter the Ethernet Address of a device if you have Block traffic through tunnel when IP spoof detected enabled in the DHCP over VPN Configuration dialog,
8. Click OK.
Note You must exclude the Static IP addresses from the pool of available IP addresses on the DHCP server so that the DHCP server does not assign these addresses to DHCP clients. You should also exclude the IP address used as the Relay IP Address. It is recommended to reserve a block of IP address to use as Relay IP addresses.
9. To exclude a device, under Exclude LAN Devices, click Add.
The Add Excluded LAN Entry dialog appears.
10. In the Ethernet Address box, enter the MAC address of the device you want to exclude.
11. Click OK.
Click OK again to exit the DHCP over VPN Configuration dialog.
Note You must also configure the local DHCP server on the remote SonicWALL SuperMassive to assign IP leases to these devices.
Note If a remote site has trouble connecting to a central gateway and obtaining a lease, verify that Deterministic Network Enhancer (DNE) is not enabled on the remote device.
Viewing and Deleting Current DHCP over VPN Leases
On the VPN > DHCP over VPN page, under DHCP over VPN, the Current DHCP over VPN Leases page shows the following information about the current leases:
• IP Address
• Host Name
• Ethernet Address
• Lease Time
• Tunnel Name
• Configure
You can free the IP addresses in the DHCP server by deleting the DHCP over VPN lease.
To delete a DHCP over VPN lease:
1. From the Current DHCP over VPN Leases list, select the lease you want to delete.
2. Click the Delete icon.
This operation may take several seconds to complete. Once completed, a message confirming the update is displayed.
To delete ALL DHCP over VPN leases:
• Click the Delete All button.