Wizards_Setup_Wizard
Chapter 81
SonicOS provides easy to use configuration wizards to assist network administrators with initial policy creation. Launch the SonicWALL Configuration Wizard by clicking the Wizards button on the top-right banner of the SonicOS management interface.

The section contains the following subsections:
• Wizards > Public Server Wizard
The first time you log into your SonicWALL appliance, the Setup Wizard is launched automatically. To launch the Setup Wizard at any time from the management interface, click the Wizards button in the top right corner, and select Setup Wizard.
Tip You can also configure all your WAN and network settings on the Network > Settings page of the SonicWALL Management Interface
The Setup Wizard helps you configure the following settings:
• WAN networking mode and WAN network configuration
• LAN network configuration
• Wireless LAN network configuration (wireless devices)
Configuring a Static IP Address with NAT Enabled
Using NAT to set up your SonicWALL eliminates the need for public IP addresses for all computers on your LAN. It is a way to conserve IP addresses available from the pool of IPv4 addresses for the Internet. NAT also allows you to conceal the addressing scheme of your network. If you do not have enough individual IP addresses for all computers on your network, you can use NAT for your network configuration.
Essentially, NAT translates the IP addresses in one network into those for a different network. As a form of packet filtering for firewalls, it protects a network from outside intrusion from hackers by replacing the internal (LAN) IP address on packets passing through a SonicWALL with a “fake” one from a fixed pool of addresses. The actual IP addresses of computers on the LAN are hidden from outside view.
This section describes configuring the Dell SonicWALL network security appliance in the NAT mode. If you are assigned a single IP address by your ISP, follow the instructions below.
Tip Be sure to have your network information including your WAN IP address, subnet mask, and DNS settings ready. This information is obtained from your ISP.
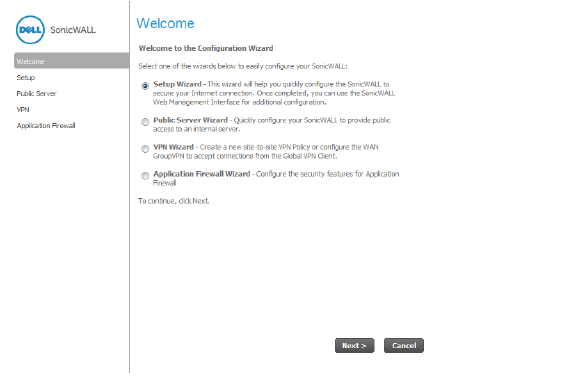
1. Click the Wizard button on the top-right corner of the SonicOS management interface. In the Welcome screen, select the Setup Wizard and then click Next.
To set the password, enter a new password in the New Password and Confirm New Password fields. Click Next.
Tip : It is very important to choose a password which cannot be easily guessed by others.
Select the appropriate Time Zone from the Time Zone menu. The SonicWALL’s internal clock is set automatically by a Network Time Server on the Internet. Click Next.
4. Confirm that you have the proper network information necessary to configure the SonicWALL to access the Internet. For Dell SonicWALL network security appliances, the WAN network mode is set to Static IP.
5. Click Next.
Enter the public IP address provided by your ISP in the SonicWALL WAN IP Address, then fill in the rest of the fields: WAN Subnet Mask, WAN Gateway (Router) Address, and DNS Server Addresses.
7. Click Next.
8. Proceed to LAN Settings.
The LAN page allows the configuration of the SonicWALL LAN IP Addresses and the LAN Subnet Mask.The SonicWALL LAN IP Addresses are the private IP address assigned to the LAN port of the SonicWALL. The LAN Subnet Mask defines the range of IP addresses on the LAN. The default values provided by the SonicWALL work for most networks. If you do not use the default settings, enter your preferred private IP address and subnet mask in the fields. Click Next.
The Optional-SonicWALL DHCP Server window configures the SonicWALL DHCP Server. If enabled, the SonicWALL automatically configures the IP settings of computers on the LAN. To enable the DHCP server, select Enable DHCP Server, and specify the range of IP addresses that are assigned to computers on the LAN.
If Disable DHCP Server is selected, you must configure each computer on your network with a static IP address on your LAN. Click Next.
SonicWALL Configuration Summary
11. The Configuration Summary window displays the configuration defined using the Installation Wizard. To modify any of the settings, click Back to return to the Connecting to the Internet window. If the configuration is correct, click Next.
12. The SonicWALL stores the network settings. Click Close to return to the SonicWALL Management Interface.