user_fileShares
The File Shares Applet has a similar look and feel to the Windows Explorer tool, featuring drag-and-drop and multiple file selection capabilities. It also provides the user the ability to set up bookmarks to quickly navigate through networks from the portal level. This feature saves time lost moving through network and server paths. The File Shares Applet leverages Sun’s Java platform browser plug-in to increase usability by mimicking the common Windows Explorer interface. With the help of the HTTPS protocol, the applet securely transfers encrypted files and information to and from the SRA appliance. The appliance communicates this data to the individual machines on the remote network.
This section contains the following subsections:
The Dell SonicWALL SSL VPN File Shares Applet is a Java application that supports Java 1.3.1 and newer, and the JRE Version 5.0 Update 10 or newer is recommended. To download the latest Java and JRE versions, visit http://www.java.com.
Supported Web browsers for SRA and Java File Shares are listed in Browser Requirements. For optimal performance, use the most recent supported version shown in this list.
The Administrator must enable the File Shares Applet for users to use it.
There must be a computer with open access for the Dell SonicWALL SSL VPN File Shares Applet to log into. The remote computer must have shared folders for files to be copied or moved. Sharing policy must be set from within the remote computer’s own operating system.
The SSL VPN File Shares Applet is easy and intuitive to use. User should be aware of its functions and limitations. Setting up bookmarks and the browser interface are covered in this section, along with an overview of the browser and sample use cases.
This section contains the following subsections:
• Using the Java File Shares Applet
• File Shares Applet Browser Overview
Bookmarks can be set up for folders and for files. A file bookmark will not launch the Applet, but instead will download and launch the file directly. Bookmarks must be enabled by the Administrator. To set up bookmarks from the Virtual Office Portal, perform the following steps.
1. Open a Web browser and log into the SSL VPN Virtual Office interface by typing the URL in the Location or Address bar and press Enter. Type in your user name in the User Name field and your password in the Password field, then select the appropriate domain from the Domain drop-down. Click Login.
2. Click the Show Edit Controls link in the middle of the portal page.
3. Click the New Bookmark tab in the portal page.
4. The Add Bookmark screen displays. Enter a friendly name for the bookmark in the Bookmark Name field.
Enter the IP address and file directory path to the File Share in the Name or IP Address field.
Note When using the Java applet, the Name or IP Address field must be to a file directory and end with a / or \ character.
6. In the Service pull down menu, select the File Shares (CIFS) option.
7. Check the Use File Shares Java Applet box to enable the File Shares Applet for this bookmark. Leaving this box unchecked means the portal will launch the original HTML browser when the bookmark is selected.
8. Optionally, select Automatically log in to log in to this file share using either your SSL VPN credentials or by specifying custom credentials.
9. Click Add.
Bookmark serve as useful shortcuts to quickly access different network locations. Bookmarks can also be set up from the File Shares Browser, either by clicking the Bookmark button, or using the bookmark option from the right-click menu.
Using the Java File Shares Applet
While loading the browser interface, warning messages might display. These messages will look different for different browsers. For the purpose of these examples, Internet Explorer 6.0 was used.
1. If you are not logged into the SSL VPN Virtual Office user interface, open a Web browser and type the Virtual Office interface URL in the Location or Address bar and press Enter. Type in your user name in the User Name field and your password in the Password field, then select the appropriate domain from the Domain drop-down menu. Click Login.
2. Launch File Shares Applet by clicking the File Shares button, or clicking on a link with the File Shares Applet enabled. The File Shares Applet will launch in a new window, separate from the Virtual Office portal.
3. Depending on available browser and Java plug-in, a warning may display, click OK to continue.
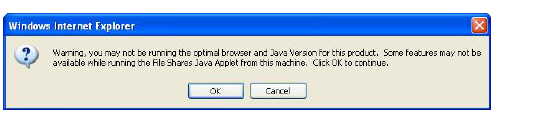
Note To avoid this warning, upgrade browser to Internet Explorer 8.0 or newer, Firefox 16.0 or newer, Chrome 22.0 or newer, or Safari 5.0 or newer. Also updates to Java 5.0 Update 10 or newer are recommended.
4. Depending on the networks configurations and browser, one or more security warnings may display. Follow the instructions to accept the certificate for the server.

The File Shares Applet displays.
The File Shares Applet window will not automatically refresh when its contents have changed or if it has been previously viewed. To refresh, click the Refresh icon from the toolbar, or use the Refresh option from the right-click menu.
Note The remote network can be browsed from the remote window’s address bar. The local directory can not be changed from the address bar. The remote path is capped at 1024 characters. The actual maximum string size will change depending on language.
5. To select multiple items, click the items while holding the shift or the ctrl key. Clicking on an item again will de-select it and remove it from the group.
6. To copy a file or group of files either to or from the network, select desired items and click-and-drag them across the center boundary. This will copy the file(s) into the open directory. Alternatively, the file(s) can be copied directly into a folder by dragging the icon and dropping over the desired folder; one could also use the copy button on the toolbar, or use the copy option from the right-click menu. A progress bar displays the waiting time required to copy the files.
The File Shares Applet supports overwriting existing files. If a file exists with the same name as the one you are trying to copy over, the Applet will prompt you to rename the file being copied. If the name is kept the same, the copied file will overwrite the existing one.
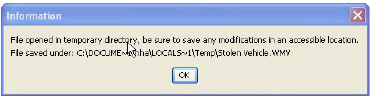
7. Double-click a file to launch it with the proper application. If activating a file on the remote machine, the File Shares Applet will first download the file to a temporary folder on your machine and then open it.
The File Shares Applet will not always be able to delete the temporary file after use. Use caution when opening files with sensitive material.
File Shares Applet Browser Overview
Each window, local and remote, contains a set of buttons for commonly used operations in the toolbar. Hovering the mouse cursor over these icons displays convenient tool tips to the user. Dragging the toolbar by the dotted line on the left side of it undocks the toolbar into its own window. To re-dock the toolbar, close the window. These are the same functions as those in the right-click menu.
Here is a list of the buttons on the task bar and their respective function.
• Back: Traverses back in the history. Sets the current view of the window to the previous location in history. This icon is dimmed if there is no previous history location.
• Forward: Traverses forward in history. This icon is dimmed if there are no forward locations in history.
• Up: Traverses up the directory tree to the parent directory of the current view. This icon is dimmed if the current view is of the root directory or if the parent directory cannot be resolved.
• Refresh: Refreshes the current view by either polling the local file system or remote network via the SSL VPN. The refresh icon will be dimmed in the remote window if its contents are currently being refreshed.
• New Folder: Creates a new folder within the respective file system. Clicking this icon displays the “New Folder” dialog box, allowing the user to assign a name to the new folder. This icon is dimmed when the location of the window is such that a new folder cannot be created. (for example, Root of a Windows filesystem, domain list, machine list).
• Copy: Copies the selected file(s)/folder(s) to the location of the remote window. Clicking this icon displays the “Copy” dialog box that will show the status information of the copy procedure. If the file being copied already exists, a new dialog will display asking the user whether or not the existing file should be replaced. The copy icon is dimmed when there are no selected files/folders to copy (for example, if no drive or domain is selected). It is also dimmed if the remote location cannot accept files copied to it (for example, Domain List/ Machine List). Copying a folder also copies everything within the folder.
• Delete: Deletes the selected file(s)/folder(s). Deleting a folder will delete everything within the folder.
Note Files deleted this way are fully removed from the original machine they were on. These files are not sent to the recycling bin and are in no way recoverable.
The following configuration examples provide a demonstration of the usefulness and flexibility of the File Shares Applet.
• Configuring Bookmarks from Within the File Shares Applet,
• Using Bookmarks from Within the File Shares Applet,
• Launching a File Directly from the File Shares Applet,
Configuring Bookmarks from Within the File Shares Applet
Navigating a remote computer’s directory hierarchy structure takes a long time. To reduce this process as much as possible, the Dell SonicWALL SSL VPN File Shares Applet allows the user to create bookmarks on the fly from within the File Shares Applet itself. This allows the user to skip the hierarchy structure of the remote computer the next time she needs to access a particular file or folder.
1. Launch the File Shares Applet by clicking on the File Shares button in the Virtual Office portal. The File Shares Applet displays.
2. The File Shares Applet’s default location for the local window is the base directory, while the remote window shows the entire network. Double-click the appropriate folders to navigate the local window to the desktop or another appropriate folder.
3. To navigate the remote window, double-click a visible computer, or input the name in the address bar preceded by \\ and followed by a \ and press Enter. The File Shares Applet will then navigate to the requested computer. It may take several seconds for the resources to load, depending on the network configuration.
Once loaded, double-click a folder or enter the target directory path within the address bar. This can take some time as the File Shares Applet must browse through the network after every change.
Note Only the remote window can use the address bar to navigate through a computer’s file hierarchy.
5. To set a bookmark to the current directory, right-click in an empty location in the remote directory and select Add Bookmark.
Note To set a bookmark for a specific file or folder, select it prior to selecting Add Bookmark from the right-click menu.
Enter a name for the new bookmark in the New Bookmark window that displays.
Click OK. The bookmark is added to the Virtual Office portal. Clicking on the bookmark accesses the selected folder or file.
Using Bookmarks from Within the File Shares Applet
In Addition to accessing bookmarks from the Virtual Office portal, bookmarks can be easily accessed from within the File Shares Applet.
1. Launch the File Shares Applet by clicking on the File Shares button in the Virtual Office portal.
Click the Bookmarks button on the task bar in the remote window. A pull down menu displays with the message Loading Bookmarks. Keep the mouse within the pull down menu as the File Shares Applet loads the bookmarks.
Once loaded, click book mark to load the desired file or folder.
The File Shares Applet is designed for ease of use. There is more than one way to perform file transfers.
This section provides an example of a folder that is copied from a remote machine onto the local machine’s desktop, deleted from the remote machine, and moved back from the local machine unto the remote machine, all from the File Shares Applet.
1. Launch the File Shares Applet by clicking on a bookmark in the Virtual Office portal.
Double-click the C:\ drive, double-click the Documents and Settings folder, then double-click a specific folder, for example, the one that holds the Desktop folder.
3. The current directory shows the Desktop folder. Select a file or folder from the remote machine and drag its icon onto the Desktop folder in the local machine. This will copy the item from the remote machine directly onto the desktop.
Once the transfer is complete, double-click the Desktop folder. The folder copied from the remote machine will display in that folder.
Note The item still exists on the remote machine. To initiate a move, not a copy, you must use the Move command from the right-click menu.
To delete the original file or folder, select it by clicking on it once, and press the Delete button on the tool bar. Alternatively, the item can be deleted by using the right-click menu. The File Shares Applet displays a delete confirmation window. Click the Delete button in the pop-up to delete the item.
WARNING The File Shares Applet will completely delete the file or folder from the remote machine. In the case of a folder, nested items will also be deleted. These items will not be sent to the recycle bin on either machine and are not recoverable.
Once the file or folder has been deleted, the File Shares Applet will automatically refresh, removing the item from the current directory. To copy it from the local machine back to the remote machine, click-and-drag like in Step 2, or use the Copy icon from the local machine’s tool bar.
Note The Copy icon in the toolbar automatically moves the selected file to whatever directory is currently open. To move an item to a different folder, either drag-and-drop it into the desired destination or open the desired destination prior to clicking Copy.
Launching a File Directly from the File Shares Applet
Files can be launched from within the File Shares Applet. This section provides an example where a remote file is queried for its properties, bookmarked and opened.
1. Launch the File Shares Applet by clicking on a bookmark in the Virtual Office portal.
Right click the file and select Properties.
The file’s properties will be displayed in a separate window.
To open the file, double-click the file. Alternatively, create a bookmark to it, and launch the file from the bookmark menu. To create a bookmark, select the Add Bookmark option from the right-click menu. The name of the file is the default name of the new bookmark, but a new name can be entered if so desired.
Then select the bookmark, either from the portal or from the bookmark tab in the toolbar.
Files launched from within the File Shares Applet must be downloaded to the local machine before they can be opened. The File Shares Applet will store the file in a temporary directory while it is being used. The File Shares Applet will also try to delete the file after use, but may be unable to do so depending on whether or not another program is accessing it. Use caution when opening files with sensitive material.
File shares provide remote users with a secure Web interface to Microsoft File Shares using the CIFS (Common Internet File System) or SMB (Server Message Block) protocols. Using a Web interface similar in style to Microsoft’s familiar Network Neighborhood or My Network Places, File Shares allow users with appropriate permissions to browse network shares, rename, delete, retrieve, and upload files, and to create bookmarks for later recall.
Note The server can be specified either by name or by IP address, for example, \\moosedc or \\10.50.165.2. For names to work, it is necessary that DNS and/or WINS be properly configured by the Administrator on the SRA appliance to be able to resolve host names.
To create a file share, perform the following steps:
1. Click the File Shares button. Virtual Office displays a dialog box that provides a hot link to a login prompt.
Pop-up window blockers may prevent File Shares from functioning properly. Configure your browser to allow pop-up windows on the SSL VPN portal site.
2. To specify a new share path (as an example, \\moosedc) in the Address field. You need to precede the share name with two back slashes. For example: \\file-directory01.example.com.
3. To connect to a pre-existing file share, click the Login to Server link next to the file share name.
4. Click the go prompt to display the Enter Network Password dialog box.
Type a valid username in the User Name field and a valid password in the Password field and click Login.
Virtual Office displays the home File Share screen that you have specified, displaying folders on the network to which you can navigate.
The following table describes the controls at the top of the File Share window.
7. You can now navigate the folders and files in the File Share as you would through Windows Explorer or other file management systems.
8. To add a new folder in the current File Share location, type the name of the folder in the Add New Folder: field and click Submit.
9. To add a file in the current File Share location, click the Browse... button. Navigate to the location of the file on your computer in the Choose file window that opens, select the file and click OK, and then click Submit in the File Share window.