NOTE: When you have finished configuring the Users > Settings page, click the Accept button at the top of the page.
Configuration instructions for the settings on this page are provided in the following sections:
|
NOTE: When you have finished configuring the Users > Settings page, click the Accept button at the top of the page.
|
|
1
|
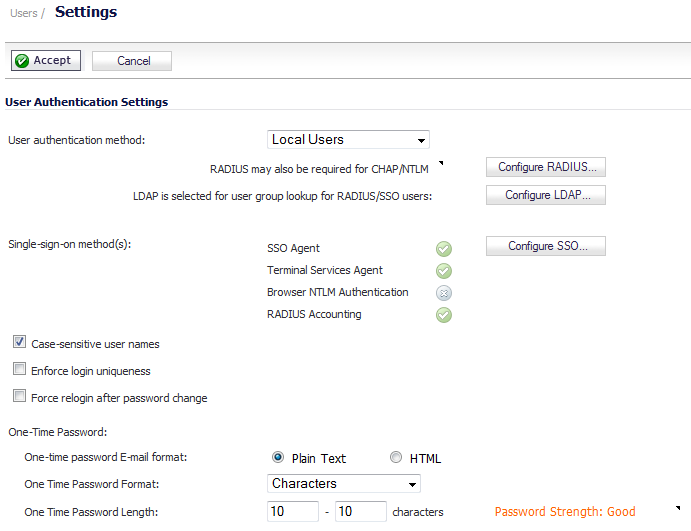
From the User Authentication method drop-down menu, select the type of user account management your network uses:
|
|
•
|
Local Users to configure users in the local database in the firewall using the Users > Local Users and Users > Local Groups pages.
|
For information about using the local database for authentication, see Using Local Users and Groups for Authentication .
For detailed configuration instructions, see the following sections:
|
•
|
RADIUS if you have more than 1,000 users or want to add an extra layer of security for authenticating the user to the firewall. If you select RADIUS for user authentication, users must log into the firewall using HTTPS in order to encrypt the password sent to the firewall. If a user attempts to log into the firewall using HTTP, the browser is automatically redirected to HTTPS.
|
RADIUS may be required in addition to LDAP in a number of cases:
For information about using a RADIUS database for authentication, see Using RADIUS for Authentication .
For detailed configuration instructions, see Configuring RADIUS Authentication .
|
•
|
RADIUS + Local Users if you want to use both RADIUS and the firewall local user database for authentication.
|
|
•
|
LDAP if you use a Lightweight Directory Access Protocol (LDAP) server, Microsoft Active Directory (AD) server, or Novell eDirectory to maintain all your user account data.
|
For information about using an LDAP database for authentication, see Using LDAP/Active Directory/eDirectory Authentication .
For detailed configuration instructions, see Integrating LDAP into the SonicWALL Appliance .
|
•
|
LDAP + Local Users if you want to use both LDAP and the firewall local user database for authentication.
|
|
2
|
For Single-sign-on method, select one of the following:
|
|
•
|
SonicWALL SSO Agent if you are using Active Directory for authentication and the SSO Agent is installed on a computer in the same domain. For detailed SSO configuration instructions, see Single Sign-On Overview .
|
|
•
|
Terminal Services Agent if you are using Terminal Services and the Terminal Services Agent (TSA) is installed on a terminal server in the same domain.
|
|
•
|
Browser NTLM authentication only if you want to authenticate Web users without using the SSO Agent or TSA. Users are identified as soon as they send HTTP traffic. NTLM requires RADIUS to be configured (in addition to LDAP, if using LDAP), for access to MSCHAP authentication. If LDAP is selected above, a separate Configure button for RADIUS appears here when NTLM is selected.
|
|
•
|
RADIUS Accounting if you want a network access server (NAS) to send user login session accounting messages to an accounting server.
|
|
3
|
Select Case-sensitive user names to enable matching based on capitalization of user account names.
|
|
4
|
Select Enforce login uniqueness to prevent the same user name from being used to log into the network from more than one location at a time. This setting applies to both local users and RADIUS/LDAP users, but it does not apply to the default administrator with the username admin. This setting is not selected by default.
|
|
5
|
To make users log in after changing their passwords, select the Force relogin after password change checkbox. This setting is not selected by default.
|
|
6
|
Configure the following One-Time Password options:
|
|
•
|
|
•
|
One Time Password Format – Select Characters (default), Characters+Numbers, or Numbers from the drop-down menu.
|
|
TIP: The format selection along with the two values for password length result in a password strength of Poor, Good, or Excellent. The strongest passwords have long lengths and either Characters or Characters+Numbers format; The weakest password strength is the Numbers format regardless of length.
|
|
•
|
At One Time Password Length, enter the minimum length in the first field and the maximum length in the second field. The minimum and maximum must be within the range of 4 to 14, with a default value of 10 for each field. The minimum length cannot be greater than the maximum length.
|
|
1
|
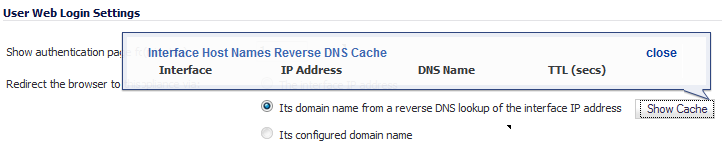
In the Show user authentication page for (minutes) field, enter the number of minutes that users have to log in with their username and password before the login page times out. If it times out, a message displays informing them what they must do before attempting to log in again. The default time is 1 minute.
|
|
2
|
From the Redirect the browser to this appliance via radio buttons, select one of the following options to determine how a user’s browser is initially redirected to the Dell SonicWALL appliance’s Web server:
|
|
•
|
The interface IP address – Select this to redirect the browser to the IP address of the appliance Web server interface.
|
|
•
|
Its domain name from a reverse DNS lookup of the interface IP address – Enables the Show Cache button which, when clicked, displays the appliance Web server’s Interface, IP Address, DNS Name, and TTL (in seconds). Click the button to verify the domain name (DNS name) being used for redirecting the user’s browser. Click close to close the display.
|
|
•
|
Its configured domain name – Select to enable redirecting to a domain name configured on the System > Administration page.
|
|
NOTE: This option is available only if a domain name has been specified on the System > Administration page. Otherwise, this option is dimmed.
|
|
•
|
The name from the administration certificate – Select to enable redirecting to a configured domain name with a properly signed certificate. Redirecting to the name from this administration certificate is allowed when an imported certificate has been selected for HTTPS web management on that page.
|
|
NOTE: This option is available only if a certificate has been imported for HTTPS management in the Web Management Settings section of the System > Administration page. See Web Management Settings .
|
|
TIP: If you are using imported administration certificates, use this option. If you are not going to use an administration certificate, select the Its configured domain name option.
|
If you use an administration certificate, then to avoid certificate warnings, the browser needs to redirect to that domain name rather than to the IP address. For example, if we try to browse the internet and are redirected to log in at https://gateway.sonicwall.com/auth.html, the administration certificate on the appliance ways that the appliance really is gateway.sonicall.com, so the browser displays the login page. If we are redirected to https://10.0.02/auth.html, however, even though the certificate says it is gateway.sonicall.com, the browser has no way to tell if that is correct, so it displays a certificate warning instead.
|
3
|
To limit redirections to the login page enter the number of times in the Limit redirecting users to times per minute per user field. The default value is 10 times.
|
|
a
|
To further limit redirects of the same page, select the Don’t redirect repeated gets of the same page checkbox. This option is selected by default.
|
|
4
|
Select Redirect users from HTTPS to HTTP on completion of login if you want users to be connected to the network through your firewall via HTTP after logging in via HTTPS. If you have a large number of users logging in via HTTPS, you may want to redirect them to HTTP, because HTTPS consumes more system resources than HTTP. This option is selected by default. If you deselect this option, you will see a warning dialog.
|
|
5
|
Select Allow HTTP login with RADIUS CHAP mode to have a CHAP challenge be issued when a RADIUS user attempts to log in using HTTP. This allows for a secure connection without using HTTPS. Be sure to check that the RADIUS server supports this option. This option is not selected by default.
|
|
NOTE: When using LDAP, this mechanism can normally be used by setting the Authentication method for login to RADIUS and then selecting LDAP as the mechanism for setting user group memberships in the RADIUS configuration.
|
|
1
|
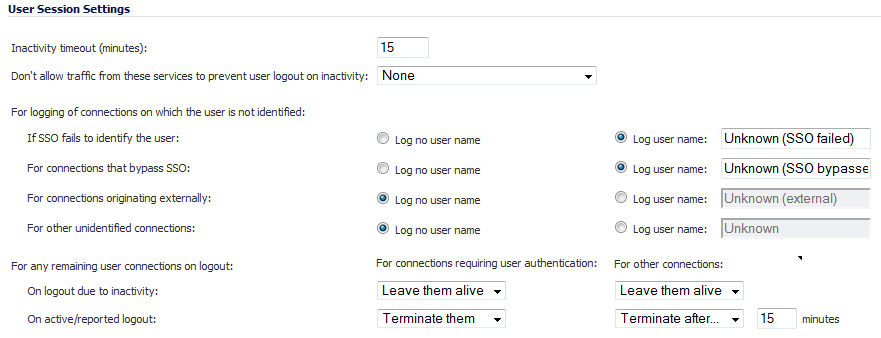
Specify the length of time for inactivity after which users are logged out of the firewall in the Inactivity timeout (minutes) field. The default is 15 minutes.
|
|
2
|
From the Don’t allow traffic from these services to prevent user logout on inactivity drop-down menu, select the service or service group option to be prevented from logging out inactive users. This option saves system overhead and possible delays re-identifying aged-out authenticated users by making them inactive instead of logging them out. Inactive users do not use up system resources and can be displayed on the Users > Status page. The default is None.
|
|
3
|
For the following For logging of connections on which the user is not identified options, select the type of logging, Log no user name or Log user name, to be done, and optionally, the log user name:
|
|
NOTE: This option also can be set in the SSO Bypass section of the Enforcement tab of the SSO Authentication Configuration dialog.
|
|
•
|
For connections originating externally: Log no user name (default); if Log user name is selected, the default user name is Unknown (external)
|
|
•
|
For other unidentified connects: Log no user name (default); if Log user name is selected, the default user name is Unknown
|
|
4
|
Specify how to handle a user’s connections that remain after the user logs out from the Dell SonicWALL appliance with the Actions for remaining user connections on logout options.
|
|
For connections requiring user authentication 1 |
For other connections 2 |
|
You can set different actions for:
|
1
|
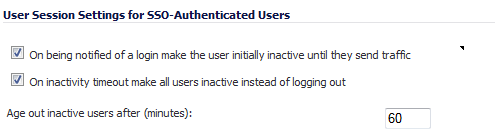
To put a user identified to the Dell SonicWALL appliance via an SSO mechanism, but no traffic has yet been received from the user, into an inactive state so they do not use resources, select the On being notified of a login make the user initially inactive until they send traffic checkbox. The users remain in an inactive state until traffic is received. This option is selected by default.
|
Some SSO mechanisms do not give any way for the Dell SonicWALL appliance to actively re-identify a user, and if users identified by such a mechanism do not send traffic, they remain in the inactive state until the appliance eventually receives a logout notification for the user. For other users who can be re-identified, if they stay inactive and do not send traffic, they are aged-out and removed after a period that can be set in Step 3.
|
2
|
If an SSO-identified user who has been actively logged in is timed out due to inactivity, then users who cannot be re-identified are returned to an inactive state. To have users who would otherwise be logged out on inactivity to be returned to an inactive state, select the On inactivity timeout make all user inactive instead of logged out checkbox. Doing this avoids overhead and possible delays re-identifying the users when they become active again. This setting is selected by default.
|
|
3
|
For inactive users who are subject to getting aged out, you can set the time, in minutes, after which they are aged-out and removed if they stay inactive and do not send traffic by selecting the Age out inactive users after (minutes) checkbox and specifying the timeout in the field. This setting is selected by default, and the minimum timeout value is 10 minutes, the maximum is 10000 minutes, and the default is 60 minutes.
|
|
1
|
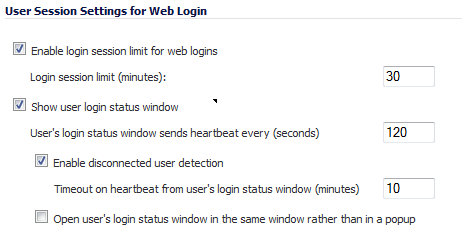
Enable login session limit for web logins: Limit the time a user is logged into the firewall via web login by selecting the checkbox and typing the amount of time, in minutes, in the Login session limit (minutes) field. This setting is selected by default The default value is 30 minutes.
|
|
2
|
Show user login status window — For users logging in via web login, displays a status window with a Log Out button during the user’s session. The user can click the Log Out button to log out of their session.
|
The User Login Status window displays the number of minutes the user has left in the login session. The user can set the remaining time to a smaller number of minutes by entering the number and clicking the Update button.
If the user is a member of the SonicWALL Administrators or Limited Administrators user group, the User Login Status window has a Manage button the user can click to automatically log into the firewall’s management interface. See Disabling the User Login Status Popup for information about disabling the User Login Status window for administrative users. See Configuring Local Groups for group configuration procedures.
|
•
|
User's login status window sends heartbeat every (seconds) — Sets the frequency of the heartbeat signal used to detect whether the user still has a valid connection. The minimum heartbeat frequency is 10 seconds, the maximum is 65530 seconds, and the default is 120 seconds.
|
|
3
|
Enable disconnected user detection — Causes the firewall to detect when a user’s connection is no longer valid and ends the session. This setting is selected by default.
|
|
•
|
Timeout on heartbeat from user's login status window (minutes) — Sets the time needed without a reply from the heartbeat before ending the user session. The minimum delay before ending the user session is 1 minute, the maximum is 65535 minutes, and the default is 10 minutes.
|
|
4
|
Optionally, select to have the user’s login status window display in the same window rather than a popup window by selecting Open user’s login status window in the same window rather than in a popup checkbox.
|
|
1
|

|
2
|
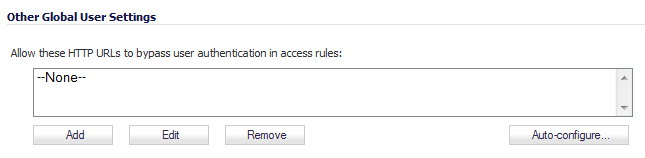
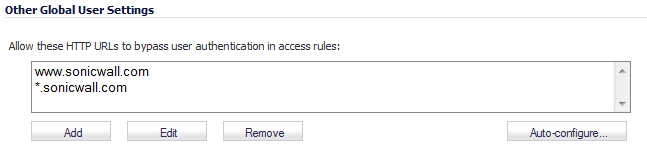
In the Enter URL field, enter the top-level URL you are adding, for example, www.sonicwall.com. All sub directories of that URL are included, such as www.sonicwall.com/us/Support.html.
|
|
3
|
Click on OK to add the URL to the list. A message displays.
|

|
4
|
Click Accept.
|
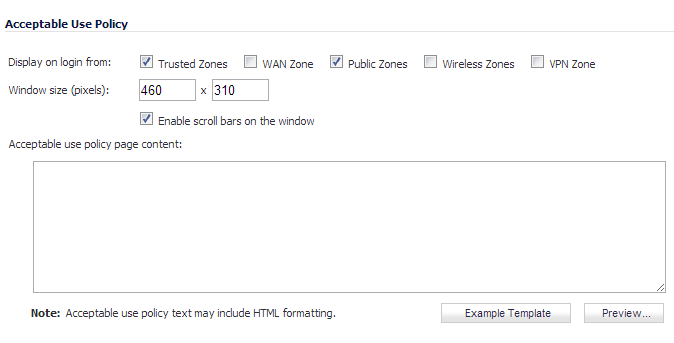
The Acceptable Use Policy section allows you to create the AUP message window for users. You can use HTML formatting in the body of your message. Clicking the Example Template button creates a preformatted HTML template for your AUP window; see Example Template .
|
•
|
Display on login from - Select the network interface(s) you want to display the Acceptable Use Policy page when users login. You can choose Trusted Zones (default), WAN Zone, Public Zones (default), Wireless Zones, and VPN Zone in any combination.
|
|
•
|
Window size (pixels) - Allows you to specify the size of the AUP window, in pixels.
|
|
•
|
Checking the Enable scroll bars on the window allows the user to scroll through the AUP window contents. Specify both:
|
|
•
|
Enable scroll bars on window - Turns on the scroll bars if your content will exceed the display size of the window. This setting is enabled by default.
|
|
•
|
Acceptable use policy page content - Enter your Acceptable Use Policy text in this field. You can include HTML formatting. The page that is displayed to the user includes an I Accept button and Cancel button for user confirmation.
|
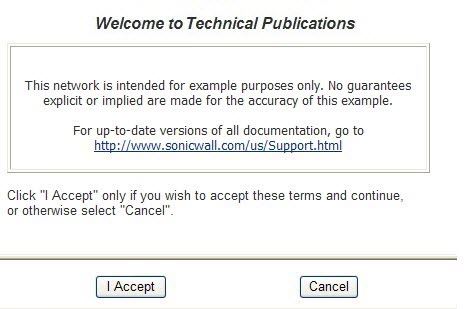
Click the Example Template button to populate the content with the default AUP template, which you can modify:
Click the Preview button to display your AUP message as it will appear for the user.
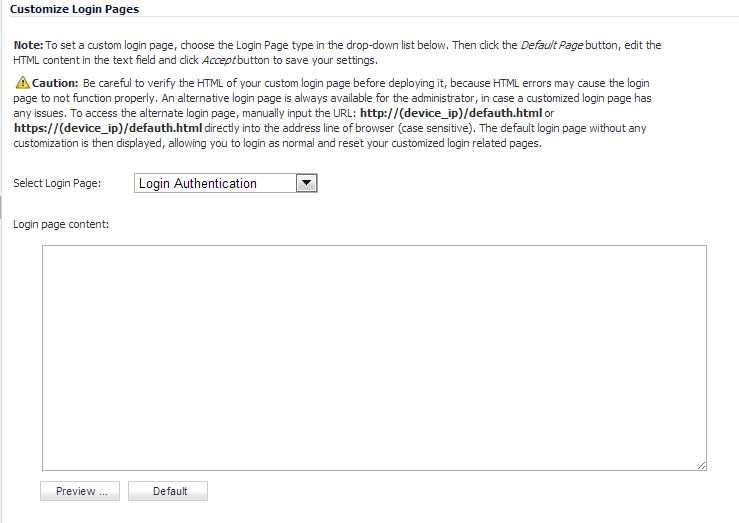
The Customize Login Page feature provides the following functionality:
The following login-related pages can be customized:
|
1
|
|
2
|
Select the page to be customized from the Select Login Page drop-down menu.
|
|
3
|
Scroll to the bottom of the page and click Default to load the default content for the page.
|
|
NOTE: The "var strXXX =" lines in the template pages are customized JavaScript Strings. You can change them into your preferring wording. Modifications should follow the JavaScript syntax. You can also edit the wording in the HTML section.
|
|
5
|
Click Preview to preview how the customized page will look.
|
Leave the Login page content field blank and apply the change to revert to the default page to users.
|
CAUTION: Be careful to verify the HTML of your custom login page before deploying it, because HTML errors may cause the login page to not function properly. An alternative login page is always available for the administrator, in case a customized login page has any issues. To access the alternate login page, manually input the URL: https://(device_ip)/defauth.html directly into the address line of browser (case sensitive). The default login page without any customization is then displayed, allowing you to login as normal and reset your customized login related pages.
|